Juanjo’s Clandestine Stratocaster Replica
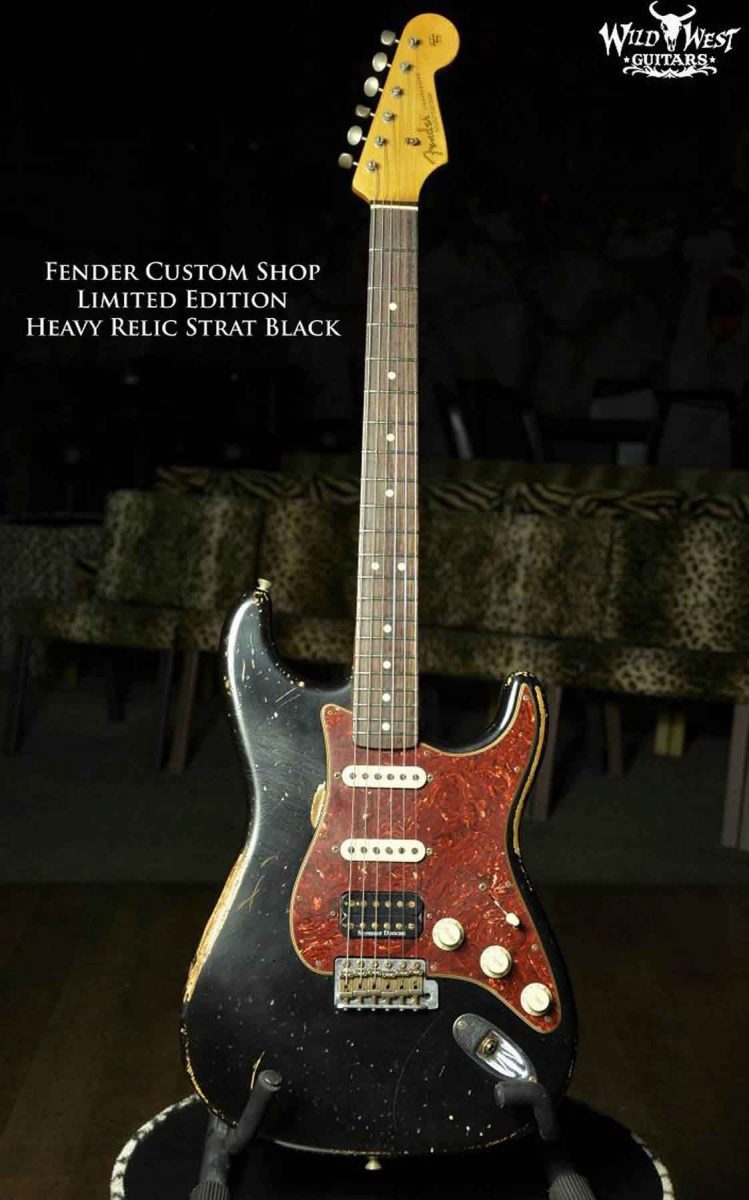
You know when you’re looking at guitars online, and at first you want to be reasonable (because of GAS and the money), but then you end up lusting after “THE GUITAR.” You know it, right? In my case, I always nearly had a heart attack when I saw the price, every single time, seriously.
€3,500 or whatever it is in dollars, I don’t care. Are we crazy or what? I know there are more expensive ones, and prettier ones… but this was my dark object of desire.
Anyway, unattainable and completely undeserved, since my guitar skills are pretty much nonexistent.
But because of an unforgivable blunder on my part, which ended with a broken neck and a crack in the body of my little guitar, the idea came to me. What if I use the hardware and electronics (which are high quality) from the damaged guitar, find a body, a neck, and any missing accessories, and build a DIY replica of “THE GUITAR.” Well, why not?
I found what I needed at “Clandestine Guitars” at a very reasonable price, and Iván’s excellent service was much appreciated. Without further ado, I present to you my own personal Frankenstein.
Technical data:
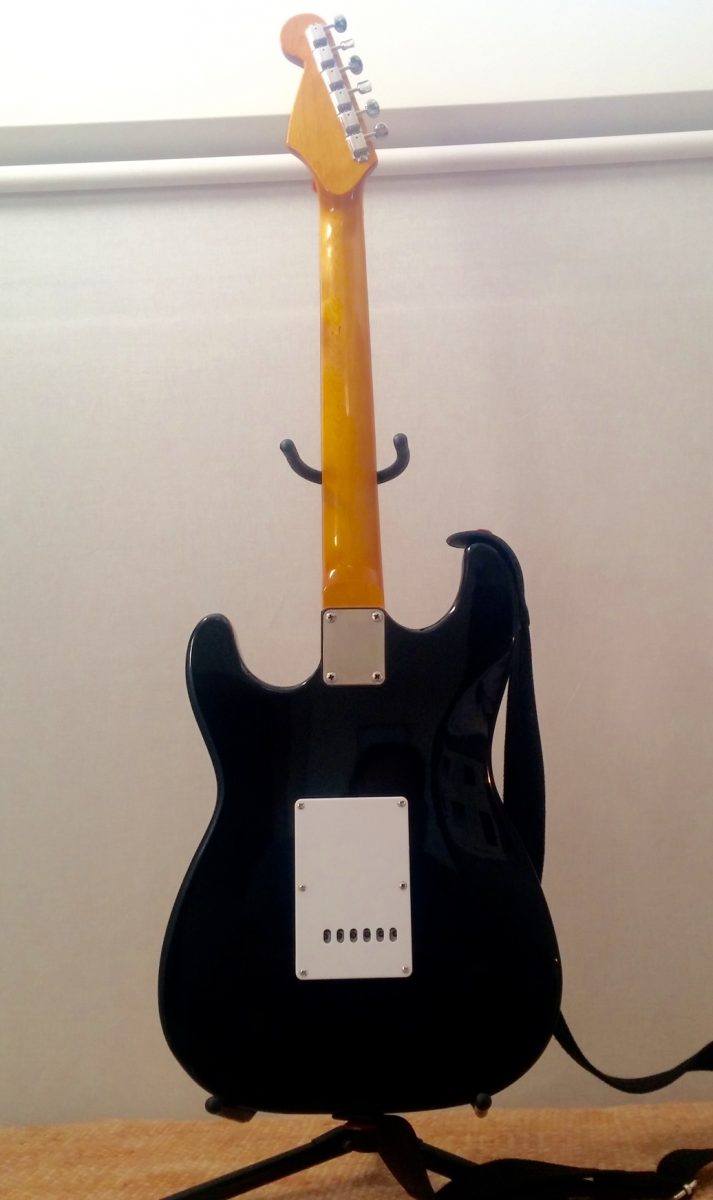
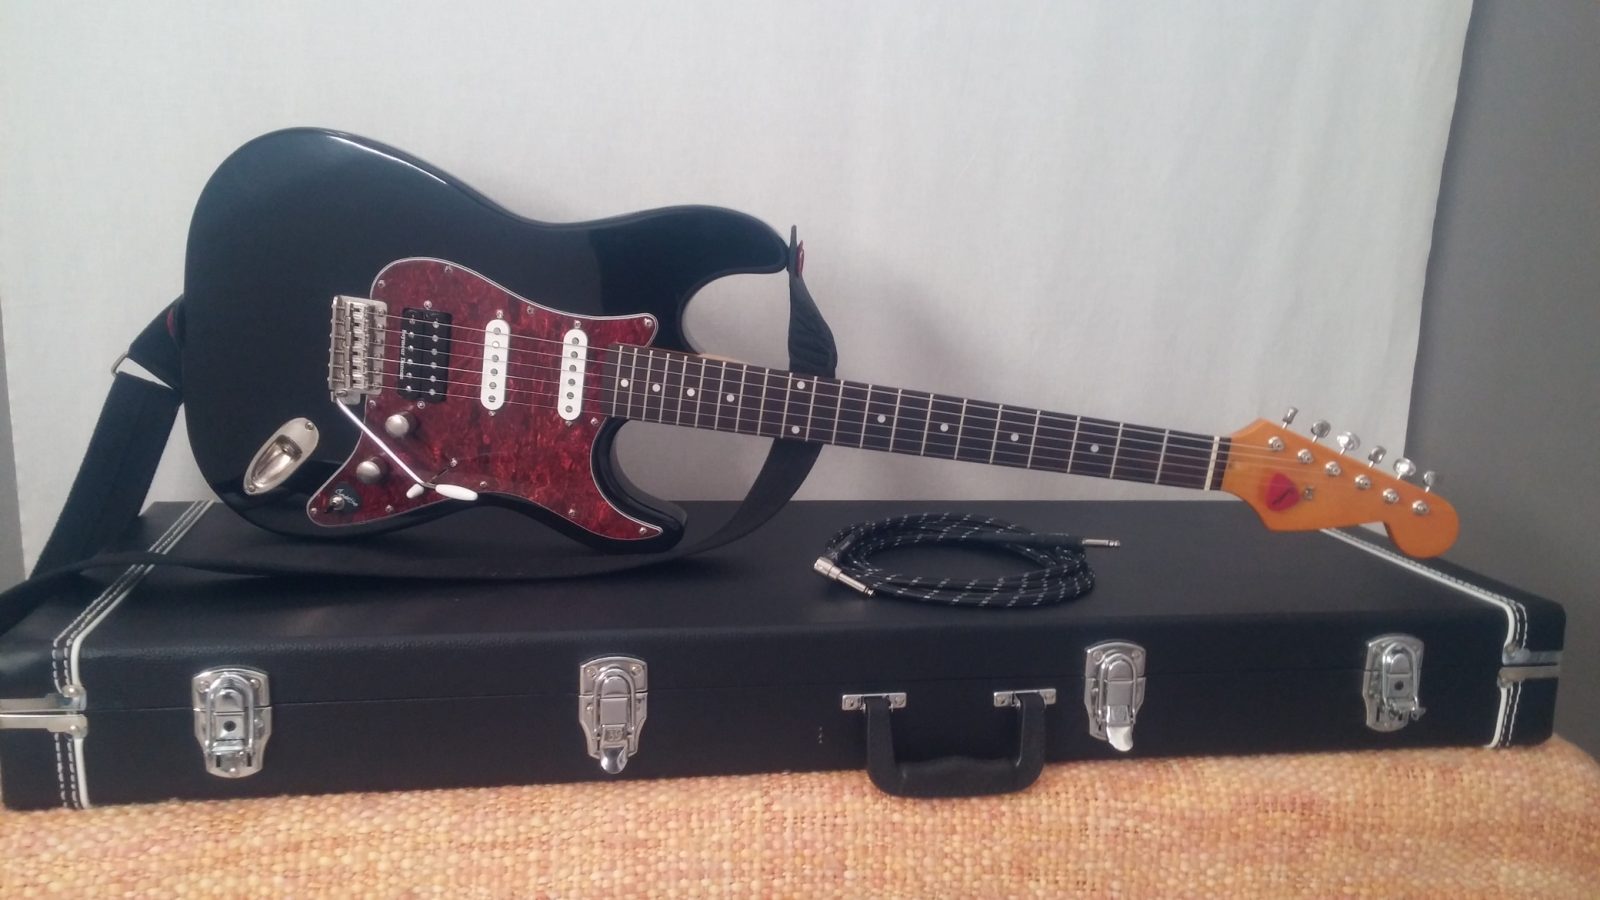
Ash body.
Maple and Blackwood tek neck.
21 frets.
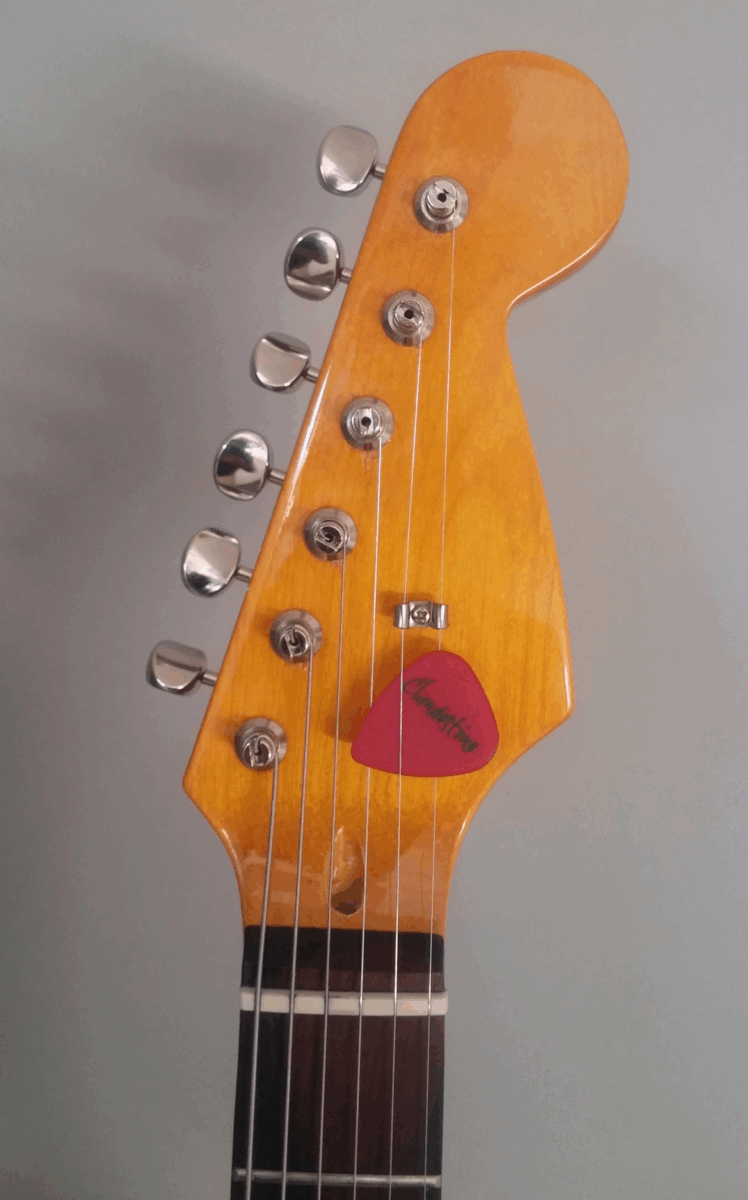
Cream-colored Tusq nut.
Kluson Deluxe tuners.
Neck pickup: Seymour Duncan SSL-5.
Middle pickup: Seymour Duncan SSL-5 RW/RP.
Bridge pickup: Seymour Duncan TB-4 JB.
Master volume pot: CTS B250K.
Master tone pot: CTS A250K + Orange Drop 0.22 YF.
Electronics cavities shielded with aluminum tape.
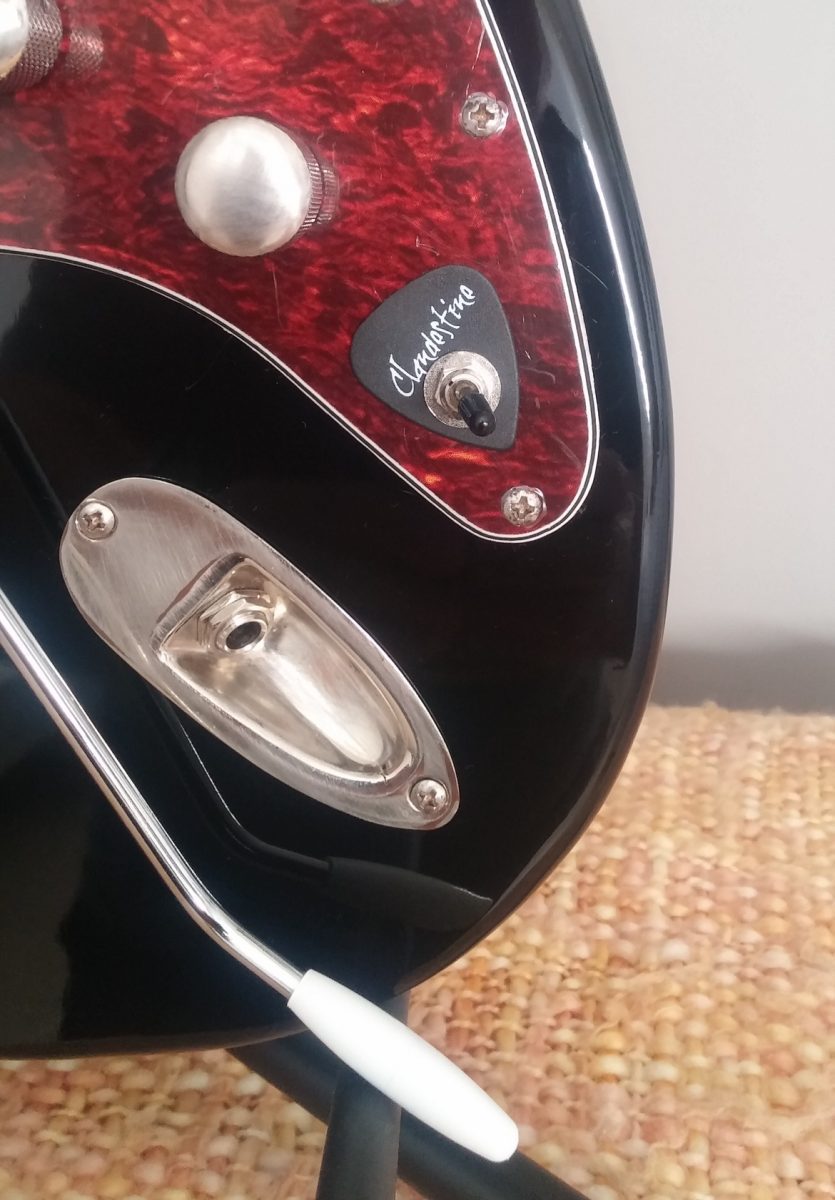
Fender 5-way switch with classic positions.
On-on switch for humbucker coil split.
Vintage Fender tremolo bridge with 6 screws and large steel block.
Weight around 4 kg (scales aren’t very reliable).
And of course, it also inherits all the gear and accessories from the donor guitar that we tinkerers tend to accumulate. We’re hopeless.
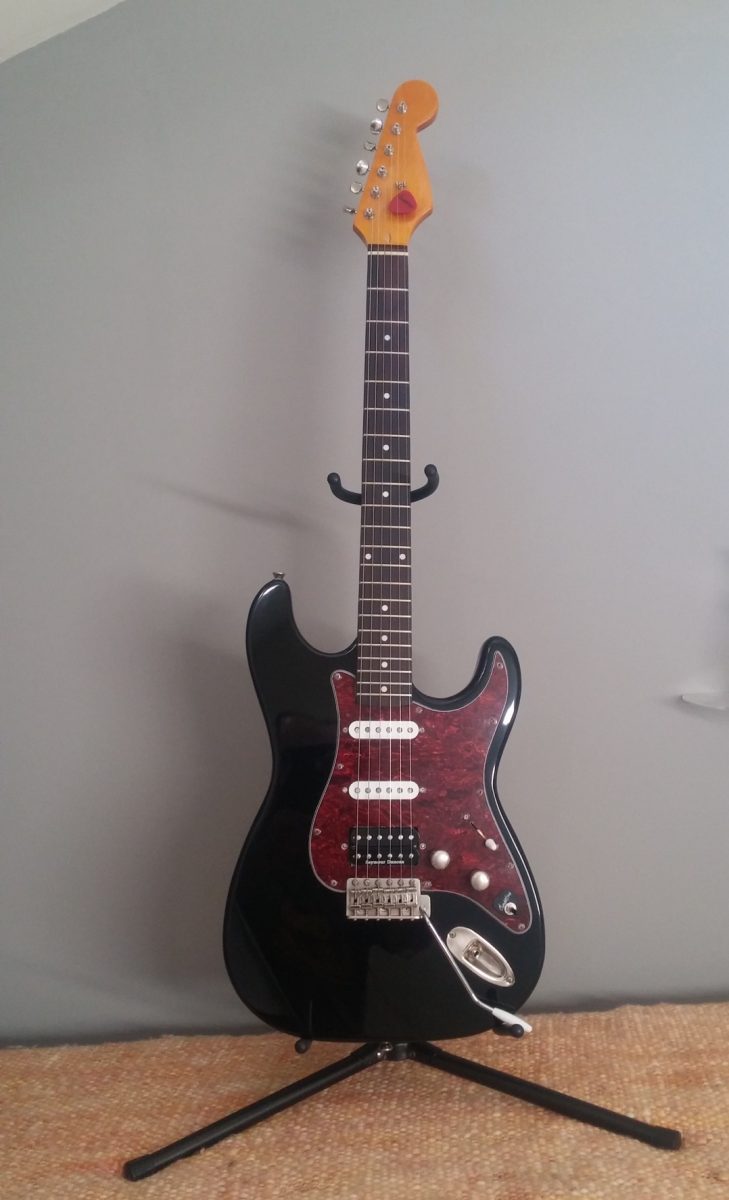
Clandestine’s Strato
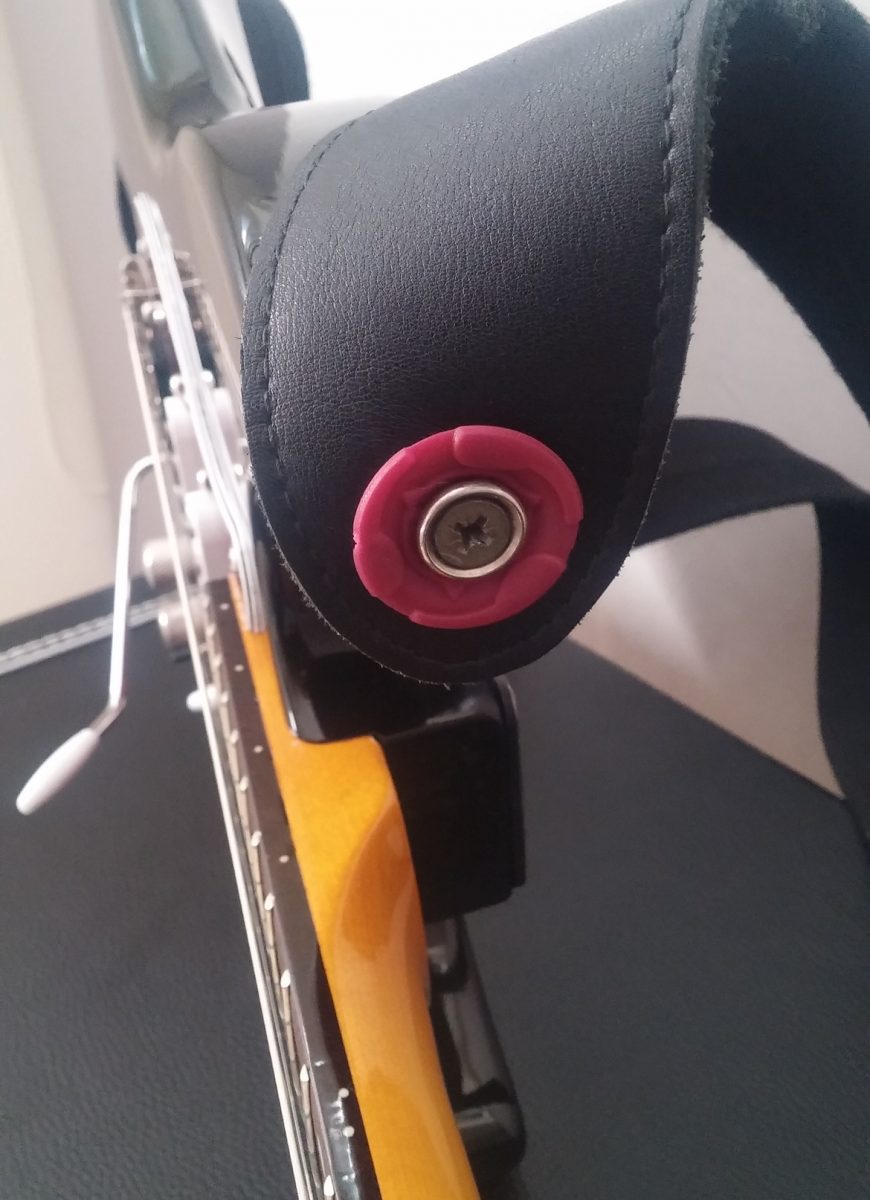
Safety first… “Put it on, put it on.” Strap lock, “poor man” model.
Well, here it is. I hope you like it. I’m absolutely thrilled with it. “It’s not a relic,” you might say. Well, no, it isn’t. For that, you have to really know what you’re doing, be meticulous and even subtle. Otherwise, you might end up with the guitar of your dreams turned into a mess. I can attest to that; it happened to me once, and I won’t repeat it. Although I still like that vintage look.
The order arrived quickly and perfectly packaged.
A few things to note about the assembly, which isn’t as straightforward as it might seem.
I adjusted the neck socket. As it came, the fretboard was a little high relative to the bridge, not much, but it’s best to adjust it with a bit of sanding. I also made a small adjustment to one of the tuning peg holes on the neck. Filing it with a round file fixed it perfectly.
You can also see the Tusq nut I installed.
I see these details as the spice that makes DIY fun. If everything were perfect, it would be too boring, wouldn’t you say? In my opinion, if you put effort into something, anything at all, you create a connection with that object.
Cheers and Rock and Roll, Jjo Sanz